
Geometry
Geometry is the study of shapes, angles, surfaces, positions, and dimensions. Geometry in a Montessori classroom is quite different from traditional education, as we use unique, hands-on materials to introduce the child to the concept of geometry he will encounter throughout life. The following activities in Montessori Geometry are:
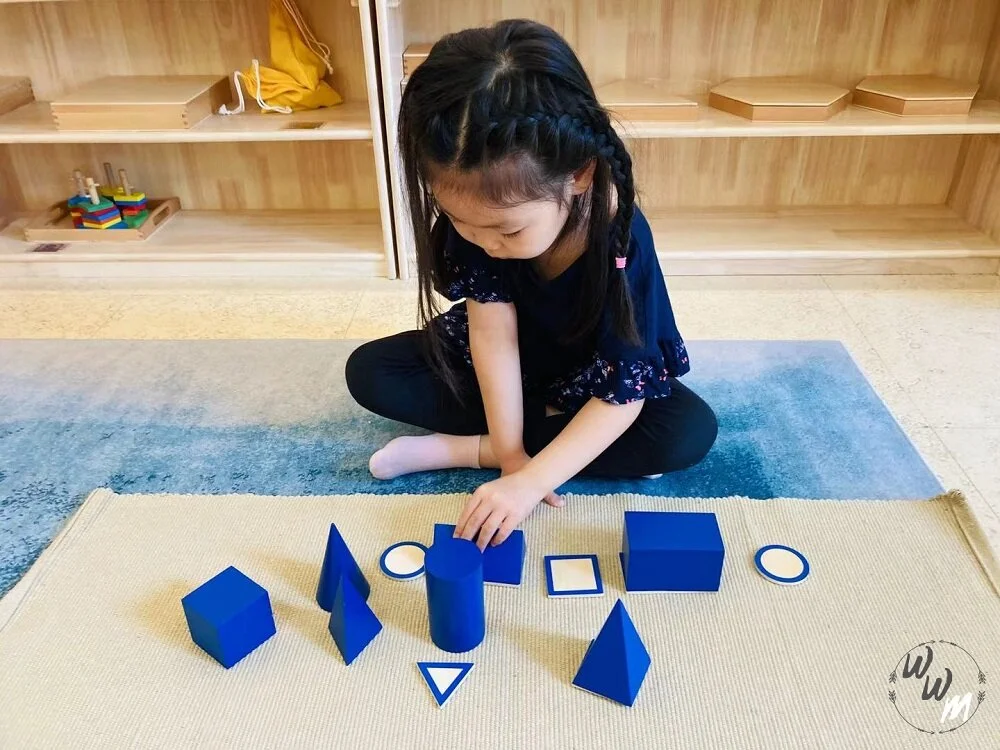
Geometric solids (presentation one)
The main aims of the first presentation are to introduce the child to the Montessori geometric solids and make him familiar with the various shapes. The child is encouraged to feel, and name three geometric solids: sphere, cube, and cone.

Geometric solids (presentation two)
This is a great matching activity for the child. In the second presentation with the geometric solids, the child is encouraged to match the geometric solids to their respective bases.
Geometric solids (presentation three)
The directress does a three-period lesson here with the child to teach him the names of each geometric solid.
Geometric cabinet
The Geometric cabinet has six drawers:
Drawer 1: Six different sized circles (one circle is the same size as the presentation tray, and the remaining are successively smaller.
Drawer 2: A square and five rectangles
Drawer 3: Six triangles: acute-angle isosceles, right-angle isosceles, obtuse-angle isosceles, acute-angle scalene, right-angle scalene, and obtuse-angle scalene.
Drawer 4: Six Polygons: pentagon (5), hexagon (6), heptagon (7), octagon (8), nonagon (9), decagon (10).
Drawer 5: Quadrilaterals: chevron, kite, trapezoid, trapezium, rhombus, and parallelogram.
Drawer 6: 4 Curvilinear figures: oval, quatrefoil, ellipse, and curvilinear triangle.
There are three sets of geometric cards for each drawer: solid outline, broad outline, and thin outline.
Geometric cabinet (presentation one)
The first activity with the Montessori Geometric cabinet is done by the directress introducing the Presentation Tray to the child. The shapes in the presentation tray are a square, circle, and triangle. The child is encouraged to feel the insets using the correct pencil grip.

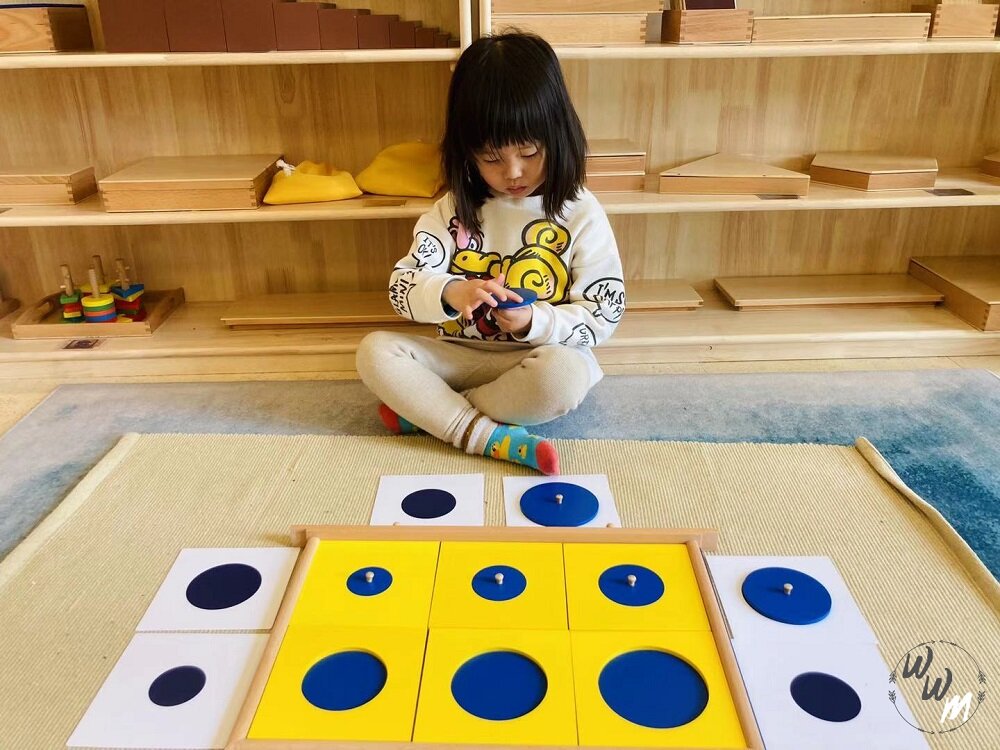
Geometric cabinet (presentation two)
In the second activity with the Geometric cabinet, the child will be working with the first drawer (circle draw). The directress will show the child how to feel the six circle insets one by one, with the correct pencil grip.
Geometric cabinet (presentation three)
The child will be encouraged to match the insets of a drawer from the Geometric cabinet to its corresponding solid outline on the card. The directress first asks the child to match the insets to the solid outline, then the broad outline, and finally the thin outline.
Presentation Four and Five are very similar to presentation three. The difference with the fourth presentation is the child will be asked to match the insets with the broad outline cards. For the fifth presentation, the child will be asked to match the insets with the thin outline cards.
Geometric cabinet (presentation six)
This presentation is done by the directress doing a three-period lesson with the child, using the Presentation tray: triangle, circle, and square. The aim of this activity is for the child to know the names of the shapes, and it is a great way for the directress to know where the child is at, and how much he understands.
Geometric cabinet presentation seven (using drawers 3-6)
The directress does a three-period lesson here with the child, using three different shapes from drawers 3-6. This naming exercise is a bit more challenging than the previous presentation, as the child will be working with more difficult shapes that are not particularly common.

Constructive triangles
There are six constructive triangle boxes in the Montessori classroom. The aim of these constructed triangle boxes is to introduce the child to the idea that visual figures and shapes can be combined to make a different shape or object. For example, two triangles might be put together to make a rectangle. The various activities with the constructive triangle boxes prepare the child for later mathematical work. The following boxes are as follows:
Box 1: The rectangular box
Box 2: The experimental box
Box 3: The triangle box
Box 4: The large hexagonal box
Box 5: The small hexagonal box
Box 6: The small rectangular box
Rectangular box
In this activity, the directress shows the child how to match the black lines of the same colour triangles in the box, in order to form quadrilaterals.

Experimental box (presentation one)
The directress will be working with both the experimental box and the rectangle box in this activity. The directress shows the child how to experiment with the blue triangles from the experimental box to see how they match the triangles from the rectangle box.
Experimental box (presentation two)
The directress will only be working with the experimental box here. The child is encouraged to use his imagination in this activity to form shapes with the blue triangles.

Triangular box
The aim of this activity is to match the black lines of the same coloured triangles in the box in order to form larger triangles. This is a wonderful activity to show the child how many different ways shapes can be divided and combined to form other shapes. This is a great activity to prepare the child for mathematics.

Large hexagonal box
This a fun activity in the Montessori classroom, that many children generally enjoy. The aim of this activity is to match the black lines of the same coloured triangle to form shapes, including a hexagon. This activity encourages the child to sustain a high level of concentration and patience throughout the exercise.

Small hexagonal box
The directress shows the child how to form various shapes from the individual shapes in the box. This activity helps the child have better judgment, it lays a foundation for reasoning, and it shows the child that figures can be held in an equilateral triangle.

Small rectangular box - 12 point star (presentation one)
In this activity, the directress teaches the child how to make a 12 point star with 12 blue acute-angled triangles. The directress will place all of the triangles on the mat, and she will begin to make a 12 point star, by placing the acute angle of each triangle in the center.
Small rectangular box - 6 point star (presentation two)
In the second presentation with the small rectangular box, the directress shows the child how to make a 6 point star, by placing the acute angle of each triangle in the center.

Small rectangular box - 4 point star (presentation three)
The third presentation is done by the directress showing the child how to make to a 4 point star by placing the right angles of each blue triangle in the center.
Small rectangular box - circle (presentation four)
The directress begins this activity by asking the child to make a 12 point star with the blue triangles like before. Once he has successfully built the 12 point star, the directress shows him how to slide the second-longest side of the figure along the hypotenuse (opposite the right angle), until all angels meet, in order to form a circle.
